
ContentDetailed description of the section content.
Assignment 2 - Blog
The goal of this assignment is to implement all the client-side functionality. An example implementation is in the image below.
Please note that the styles are not provided for this assignment, and your application can look different. But the nicer and more usable it is, the better the mark.

Success Criteria
- ✅ All of the tests must be passing
- ✅ Make the app look as good as you can
- ✅ You must be able to explain any code in the codebase and your reviews
- 💬 Validate, discuss and approve all pull requests in your second project
💼 System Requirements
- User must see the list of blog post categories, where each category points to UI showing only posts of that category
- User must see the list of blog post tags, where each tag points to UI showing only posts of that category
- User must see the history of blog posts, showing month and year, where each moth, year tuple points to UI showing only posts of that category
- The list shows the following items:
- blog title, pointing to detail page
- short description
- date
- image
- tags
- likes
- views
- Detail page shows the same items as list item, but the short description is replaced by formatted long description
- Detail text is stored as Markdown, which needs to be converted to HTML
- There is a search functionality that filters blogs based on string found in title or description
Joining Projects
Please watch the presentation to understand about the roles you will play. As explained, you will work on two repos. In one repository you will develop your code, in another one, you will review and approve pull requests from another developer. Therefore the process is following:
- Use one of the following links and create a new group in which you will host your project and the reviewer:
- Groups A: https://classroom.github.com/a/RLIQSiNk
- Groups B: https://classroom.github.com/a/5z5vX17I
- If one link tells you that the maximum number of groups was reached, just use the other one
- Remember which link you have used to create your group (A or B)
- Once you create your group and set up the project as per below, go to the group link and join one of the projects. It is possible that yet there will be no projects, just try at a later date.
> ⚠️ IMPORTANT: You cannot join the group of your reviewer, meaning that you cannot review code of your reviewer. You must find a different person. We will check for that.
- Once you have created your group, please accept that assignment and clone your project to your computer and continue with instructions below.
Prerequisites
First, make sure that "pnpm" and "turbo" is installed in your computer. If not, please follow installation instructions for pnpm. If turbo is not installed, please install it using pnpm with the following command:
Then, run the following command to install turborepo.
pnpm add -g turboInstalling the project
Once the pnpm is installed, in the root of the project install the packages
pnpm iTo run end to end tests you need to install headless browsers. Please run the following command in the tests/playwright-web directory
pnpx playwright installConfigure the Environment Variables
In the apps/admin and packages/db project, duplicate the .env.example file and rename the duplicate to .env. In the .env file set the correct values, for example in the apps/admin these woulde be the values that you set:
PASSWORD=123
JWT_SECRET=super-secret-password
In the packages/db you need to set path to your SQLite database:
DATABASE_URL="file:./dev.db"Please remember to modify both projects! If you fail to set the variables, the next step will result in errors.
Running the project
To run the project, run the following command in the root directory of your project:
turbo devThis will run:
- Client application at http://localhost:3001
- Admin application at http://localhost:3002
Running tests
To run the tests please run, you have two options.
Running Tests in Console
If you only wish to visualise the test results in console, please run the following command in the root of your project:
turbo test-1This launches the turbo console UI similar to below, where you can swap between different projects:

⚠️ Make sure that ALL tests pass!
If you want to run the tests for second part (i.e. Assignment 2.2) or third part (i.e. Assignment 2.3), run these commands:
turbo test-2 // or
turbo test-3
If you want to run all tests, please run
turbo all:testRunning Tests in UIs
The packaged tests framework also have the possibility of visually represent your tests for nicer view of test results. To see the UIs, run this command instead of turbo test-1
turbo dev:test-1This will launch the End to End testing framework Playwright's test UI similar to below, please use the Play buttons to run individual tests:

It also launches the unit and integration test framework Vitest's UI, similar to below. Here, you can also use the play buttons to execute individual tests!

Project structure
The project is monorepo with the following packages split into three categories:
Applications
Contains the following web applications:
- apps/admin - Admin Website
- apps/web - Client website
Packages
Contains the following packages with shared code and configurations:
- packages/ui - Library of UI elements shared between admin and client
- packages/utils - Library of utility functions shared between other projects
- packages/db - Contains code relate to access and handling of application data
- packages/env - contains the type safe configuration and validation of environment variables. Very useful when you forget about that pesky variable either in your local development, CI pipeline or deployment
- packages/eslint-config, packages/tailwind-config and packages/typescript-config contain configuration files for build pipelines for this project
Tests
Contains the following test applications:
- tests/playwright - End to End tests for the admin and web applications
- tests/storybook - Configured storybook instance for development and testing of React components in isolation
Application Structure
The client application comes with pre-defined router (only one route is missing for your learning). The client application also comes with pre defined structure of components and utilities for you to complete. The admin application is much more bare with most functionality AND structure needed to be completed by you.
Visual Studio Code
If you use the Visual Studio Code for your development, we stringly recommend installing the following packages:
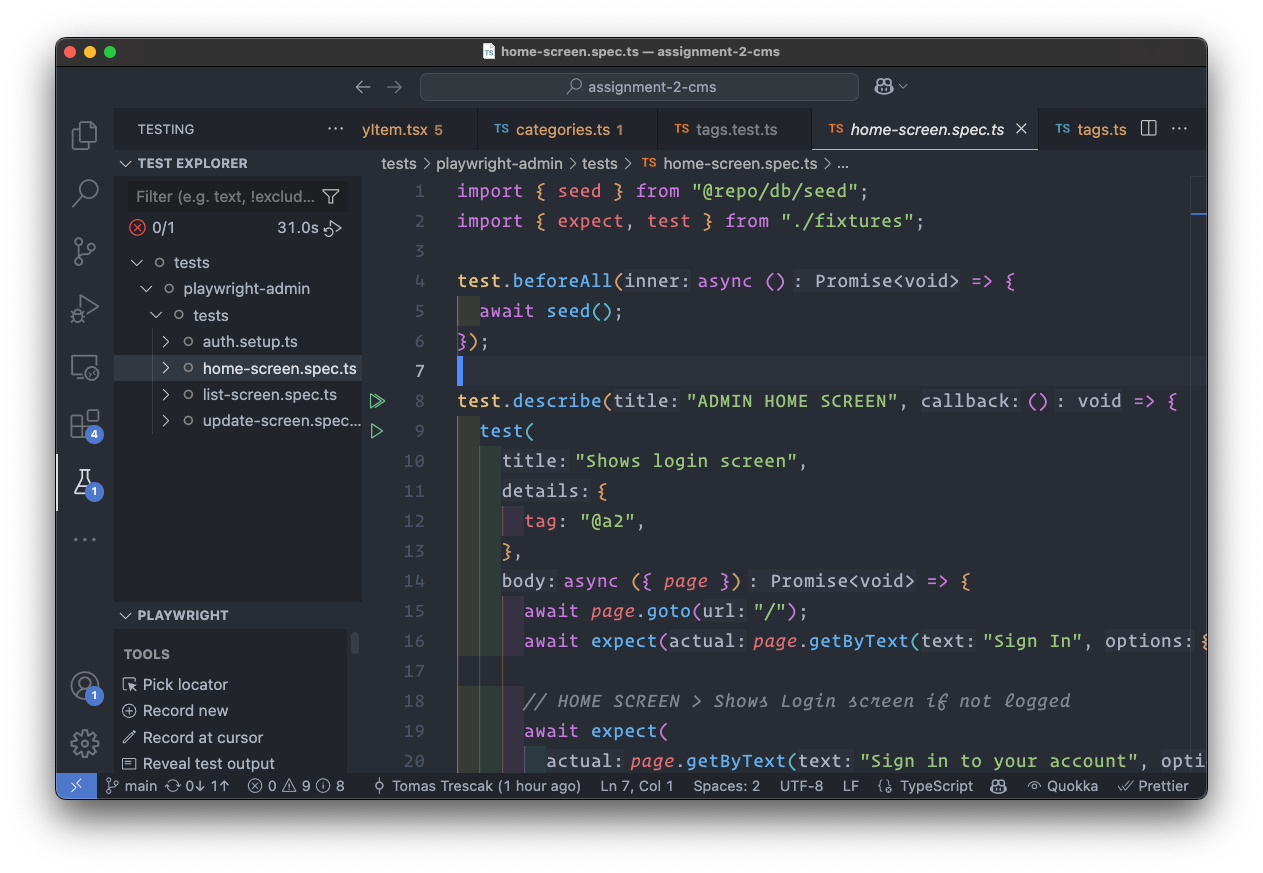
If you install these plugins, you can find all your tests in the Test Explorer (see image below), allowing you to execute and debug your tests.
Good Luck!